From our Collection Team
In the early days of photography from the 1840’s, having a portrait taken was a very special and expensive event. The resultant photographs were a unique object created in camera. To protect and show these portraits off to best advantage the photograph was presented in a beautiful small leather-bound case and framed with a gilded matte. Sometimes small touches of colour were applied.
The three most common photographic processes to create cased photographs were: Daguerreotype, Ambrotype and Tintype.

The Moruya and District Historical Society has a small collection of Ambrotypes and Tintypes dating from the 1850’s. Unfortunately, the cases are quite fragile and the hinges often broke leaving the image without the cover and thus susceptible to dirt and damage. Some of the photographs have been removed from the cases and the original case was possibly reused to house a new photograph or some treasured keepsake.

Right – Unknown personsc1860, Ambrotype (Ambrotype, no case or matte). MDHS 021/014
Daguerreotype (1839 – ~1860)
The Daguerreotype was the first commercially successful photographic process. It was developed by Louis Jacques Mandé Daguerre and announced officially 19th August 1839, although demonstrations of the process had been happening since 1837.
The process began with a highly polished silver metal coated copper plate being made sensitive to light by exposing it to iodine fumes, later bromine was used to increase the light sensitivity of the silver coating. Iodine and bromine are known as halogens and the compounds formed with silver are referred to as silver halides. This sensitising process was of course done in the total dark. On exposure to light the silver halide reverted to silver metal in proportion to the amount of light received.
The silver image was very faint, invisible to the naked eye. To intensify the image the plate was developed by exposure to heated mercury fumes. The mercury and silver metal formed a highly reflective amalgam, while the unexposed (shadow) areas remained somewhat less shiny. Mercury fumes are very dangerous!
To ‘fix’ the image to prevent further exposure the plate was treated in a solution of sodium thiosulphate, known as “hypo”. It soon became standard procedure to also ‘gild’ or gold tone the image to increase the resilience of the highly fragile silver amalgam on the surface of the plate.
To further protect the delicate surface of the image the Daguerreotype was placed in a case, this also created a precious object in its own right.
Daguerreotypes are highly reflective and require specific viewing conditions to see the image in all its glory.
Ambrotypes (1854 – c1865)
The introduction of the collodion or wet-plate process in 1851 led to the Ambrotype process being patented in 1854 by James Ambrose Cutting.
The process used a glass plate coated with liquid collodion (cellulose nitrate dissolved in alcohol and ether… highly flammable!) to which had been added iodine. Getting an even coating over the entire plate in the short time before the collodion became more viscous was a real skill, and it was done in the dark! The wet plate, hence the name wet-plate photography, was then dipped in a solution of silver nitrate to create a light sensitive coating. The whole photographic process, from creating the plate, to exposing and processing, had to be completed before the collodion dried.
On exposure the silver halide formed metallic silver in proportion to the amount of light it received. This again required a development process to intensify the image. This formed a negative, or reversed, image in which the parts exposed to the most amount of light were darker (more silver) than the shadow areas (less silver).
The image was fixed to prevent the unexposed areas from darkening over time.
To view the image the glass plate was either, placed on black velvet with the image side up; i.e. facing the viewer, or the reverse, or non-image side, was coated with a thick black lacquer.
A positive image was seen because the silver metal was more reflective than the black background. You can try this with an old black and white photographic negative (colour negatives won’t work). The less tricky method of viewing made Ambrotypes increasingly popular compared with Daguerreotypes.
As the thin collodion layer that contained the image was also easily damaged, Ambrotypes were also placed in cases.
Tintypes (1856 – c1950)
Tintypes, also known as Ferrotypes, have much in common with Ambrotypes. And at first glance it can be difficult to determine the difference between an Ambrotype and a well made Tintype.
To make a Tintype a thin sheet of metal, usually iron or steel, was coated with a layer of black lacquer. In the wet collodion process a light sensitive coating of collodion was coated over the top of the lacquer. The plate was exposed and processed along similar lines to an Ambrotype, although the exposure was slightly less to create a less dense silver image. After developing and fixing the plate was lacquered to protect the image. There was a later dry tintype process where the plates could be pre-coated, dried and exposed later.
The Tintype process was much cheaper than either Daguerreotypes or Ambrotypes and was incredibly popular. And while the final photograph may be cased, this was less necessary than for the other processes and small individual Tintypes are very common.
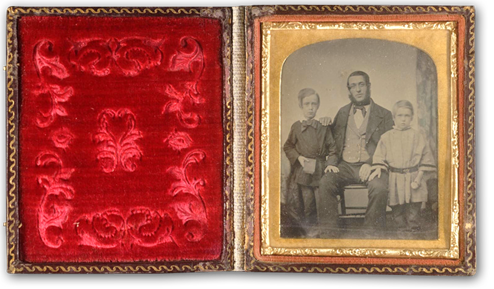
The cases
The photographs were presented in small clamshell cases made from wood, leather, gilded metal, velvet and a layer of glass to protect the image. The case could be opened and propped up on a shelf for display. As time progressed the matt and gilding surrounding the photograph became more and more ornate, the amount of ornamentation may give a bit of a clue as the date of the photograph, assuming it is still all original.
If the glass is dirty clean it by lightly brushing with a clean microfibre cloth, do not use window cleaner or other product. Very old glass may deteriorate and produce small spots of what looks like water on the inside of the glass in the case. This is not water and trying to remove it will do far more harm than good.
The example also shows the damage due to someone trying to clean the photograph and consequently causing serious scratching. Never try to clean the actual photograph.
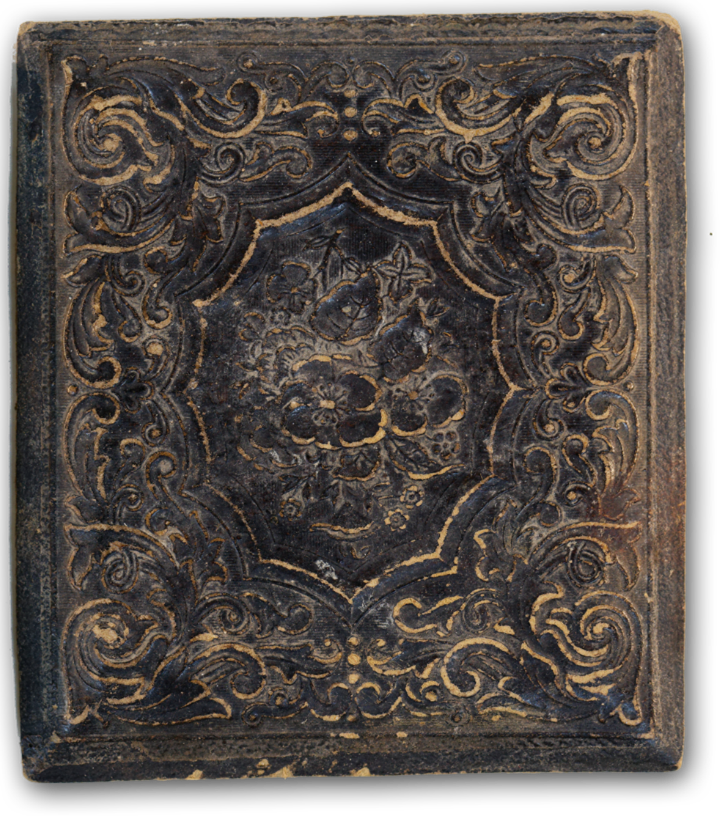
The outside of the case may also be quite ornate with tooled and embossed leather, some cases may have also have had small touches of gilding.

Identifying the process
Daguerreotypes are quite easy to identify as the reflective image is highly reflective and mirror-like under some lighting conditions, unlike either of the other processes.
Ambrotypes and cased Tintypes can be difficult to tell apart. Usually Tintypes have a lower contrast and the dark areas may not be quite as dark as a similar Ambrotype.
Sometimes the Tintypes metal plate support has begun to corrode and rust coloured patches may appear on the surface. As can be seen in this example.
If in doubt ask a photographic conservator. Since all three processes created unique objects, as they are formed by the actual light from lens of the camera with no other steps, the amount of detail in the image of each process is astounding, limited only by the quality of the lens.

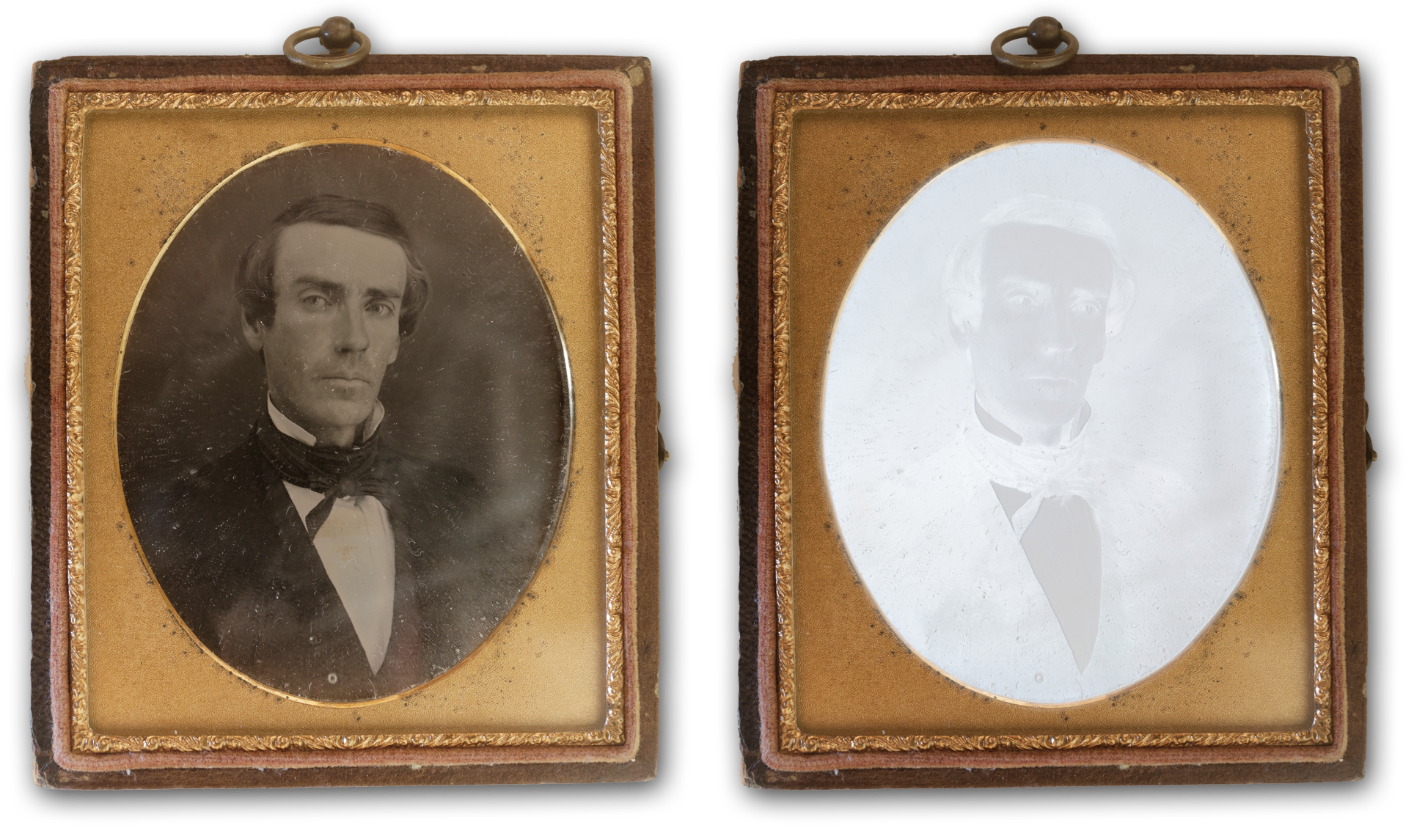
Spot the difference
These two ambrotypes arrived at the museum with no information, one didn’t even have a case. At first the two appear to be identical, but there are some clues that these may have been taken at different times, can you see the differences?


Leave a Reply